

The GeoBuddy Multistep Form addon converts the standard GeoDirectory Add Listing form into a clean, guided step-by-step wizard. Instead of presenting users with one long form, the addon breaks it into smaller, manageable steps — each with a visual progress indicator — making the submission process feel less overwhelming and significantly reducing form abandonment.
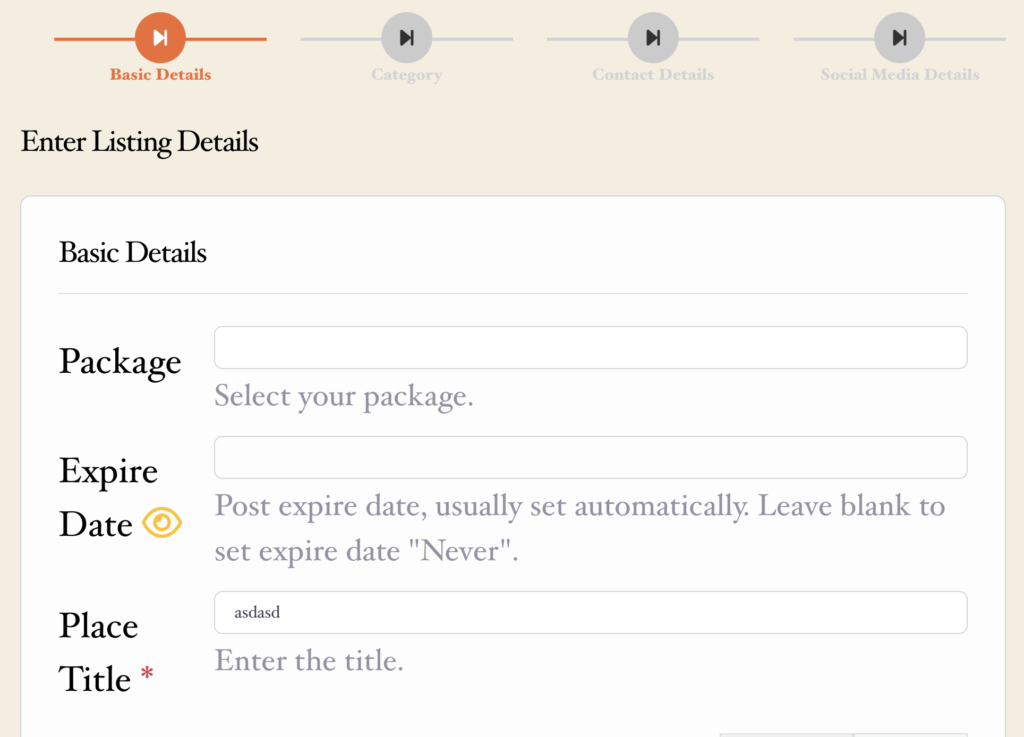
How it works #
The addon works automatically once activated and configured. It takes your existing GeoDirectory Add Listing form — with whatever fields you have set up — and splits them across multiple steps based on GeoDirectory’s built-in field groups. No manual step builder or field remapping is required.
What the addon includes #
- Converts any GeoDirectory listing form into a multi-step wizard
- Visual progress bar showing users exactly where they are in the process
- Real-time form validation before moving to the next step
- AJAX-powered smooth transitions between steps
- Multiple layout and style options
- Save and resume functionality
- Conditional logic support
- Compatible with all GeoDirectory field types
- Custom styling options
- Mobile-responsive design
- Translation ready
Requirements #
- GeoBuddy core plugin installed and active
- GeoDirectory plugin installed and active
- An active GeoBuddy Bundle Membership or a single-site license from wpgeobuddy.com
- A GeoDirectory Add Listing form with at least one listing type configured
Step 1 — Purchase and download #
The Multistep Form addon is a premium addon — there is no free version. Purchase a license from wpgeobuddy.com or get it as part of the GeoBuddy Bundle Membership. After purchase, download the addon ZIP file from your account.
Step 2 — Install the addon #
- Go to Plugins → Add New Plugin → Upload Plugin.
- Select the addon ZIP file and click Install Now.
- Click Activate Plugin.
After activation, a Multistep Form item will appear under the GeoBuddy menu in your WordPress admin sidebar.
Step 3 — Choose a form style #
Go to GeoBuddy → Multistep Form in your WordPress admin sidebar to open the settings panel.
The settings panel lets you choose the visual style of the step-by-step wizard. The style controls how the progress indicator and step navigation appear to users on the front end.
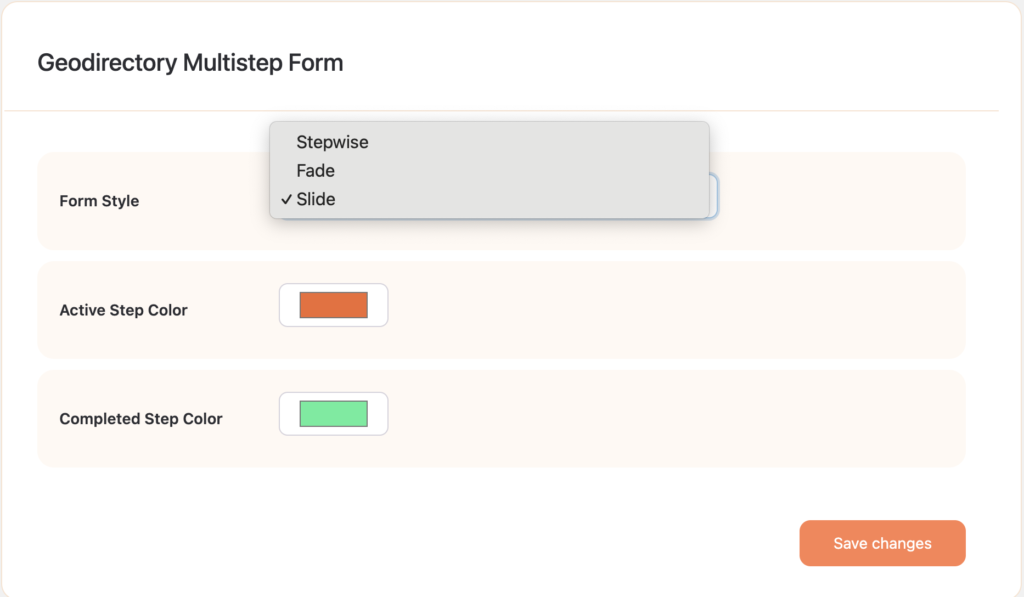
Available styles include:
- Stepwise style — a clean step-by-step layout with a standard progress bar
- Slider style — a horizontal sliding transition between steps for a more dynamic feel
- Fade style — a horizontal fading transition between steps for a more dynamic feel
Step 4 — Add Steps fields to your listing form #
This is the most important configuration step. You need to add Step fields to your GeoDirectory listing form to define where each step begins. Without the Steps fields in the form, the multistep wizard will not know how to split the form.
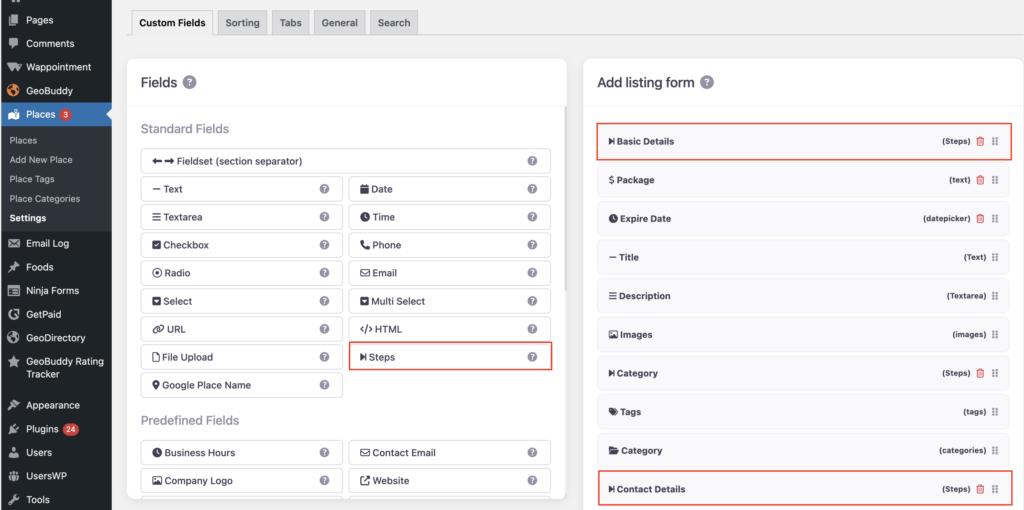
- Go to GeoDirectory → Places (or your listing type) → Settings → Custom Fields.
- In the Fields panel on the left, scroll down to Standard Fields and locate the Steps field.
- Drag the Steps field into the Add Listing Form panel on the right, placing it at the position where you want a new step to begin.
- Give the Steps field a name — this name becomes the step label (e.g. Basic Details, Contact Details, Location).
- Repeat for each step you want to create. Each Step field you add marks the start of a new step.
- First step will always be the first field in the custom field list.
How steps and fields relate #
All fields placed between two Step separators in the Add Listing Form belong to the step above them. For example:
- Steps: Basic Details → Title, Description, Images (fields below this Steps field up to the next one)
- Steps: Contact Details → Phone, Email, Website (fields below this Steps field)
You can drag and reorder fields within the form to control which fields appear in each step. Save your field configuration when done.
Step 5 — Save settings and verify #
Click Save Changes in the settings panel. Then visit your GeoDirectory Add Listing page on the front end to confirm the form is now displaying as a multi-step wizard.
How the form works for listing owners #
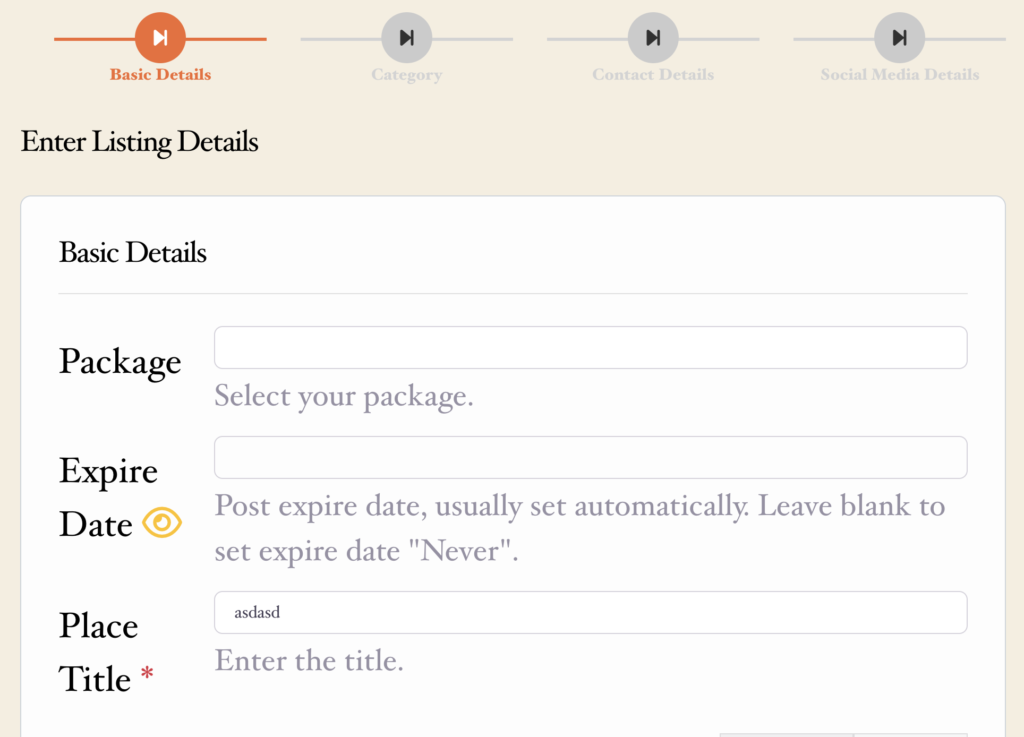
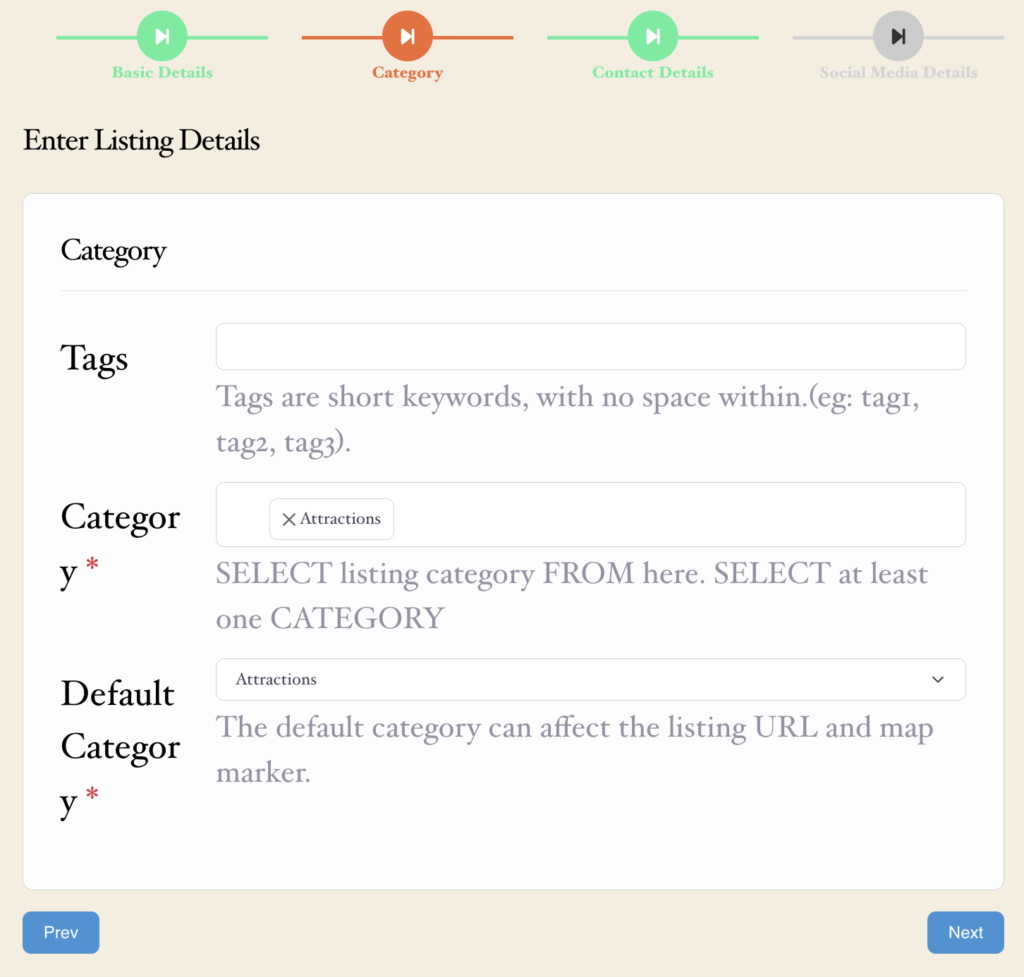
When a user visits the Add Listing page, they see the first step of the form instead of one long single-page form. Here is what the experience looks like:
- The user fills in the fields shown in the current step.
- Real-time validation checks the fields before allowing the user to proceed — required fields cannot be skipped.
- The user clicks Next to move to the following step. The transition is smooth and AJAX-powered — no page reload.
- The progress bar updates to show how many steps are complete and how many remain.
- The user can click Previous at any time to go back and edit earlier steps.
- On the final step, the user submits the listing as normal.
Save and resume #
The addon includes a save and resume feature. If a user starts filling in the form but does not complete it in one session, their progress is saved. When they return to the Add Listing page, they can continue from where they left off — without starting over.
Compatibility #
The Multistep Form addon is compatible with all GeoDirectory field types — including custom fields, image uploads, maps, business hours, and fields added by other GeoDirectory addons. All fields continue to work exactly as they do in the standard form — they are simply reorganised across steps.
Troubleshooting #
Form is still showing as a single page after activation #
- Confirm the addon is activated under Plugins → Installed Plugins.
- Confirm you have selected a style and clicked Save Changes in GeoBuddy → Multistep Form.
- Clear your site cache if you are using a caching plugin, then reload the Add Listing page.
Validation is not working between steps #
- Check for JavaScript errors in your browser console — a theme or plugin conflict may be preventing the addon’s scripts from loading.
- Temporarily switch to a default WordPress theme (Twenty Twenty-Four) to rule out a theme conflict.
Custom fields not appearing in the right step #
- The addon splits steps based on GeoDirectory’s built-in field groups. Review your field group configuration in GeoDirectory → Listing Fields to adjust which fields appear together.


